
Garbage Disposal Installation | Lexington,KY
Putting in a garbage disposal is not as complicated as it looks. Most Lexington KY homeowners knock it out in a couple of hours using tools they already have sitting in a drawer somewhere. No special background required, just the right steps done in the right order.
This guide covers garbage disposal installation, starting to finish what it costs, when a plumber makes more sense, and how to keep the unit going after it is in.
What You Need Before You Start
Pull everything together before you get under the sink. Stopping halfway through to hunt for a tool is a pain nobody needs.
- New garbage disposal unit
- Flathead and Phillips screwdrivers
- Plumber’s putty
- Adjustable wrench
- Bucket and old towels
- Pipe wrench
- Safety glasses and work gloves
Worth doing before you even buy the unit measure the drain opening in your sink. Most are 3.5 inches but not every sink is, and figuring that out after you are already home saves you a trip back.
How to Install a Garbage Disposal Step by Step
Step 1 — Kill the Power Before Anything Else
Head to the breaker box and shut off power to the kitchen. Do not skip this. If you are not sure which breaker runs the kitchen, grab a voltage tester and check the outlet under the sink before you put your hands anywhere near it.
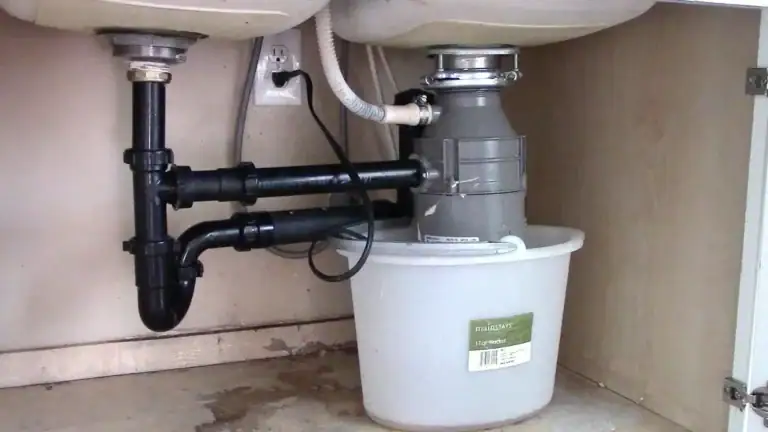
The bucket goes under the drain. Disconnect the pipes and let whatever water is sitting in there drain out. Old unit still mounted? Twisting it counterclockwise off the ring might need to back a couple screws out first depending on how it was put in originally. Set it aside.
Step 2 — Get the Flange Sorted
Old flange comes out first. Clean the area around the drain hole any buildup or old putty needs to go so the new flange sits flat against the sink.
Roll plumber’s putty into a rope, press it around the bottom edge of the new flange, and push it into the drain from above. Get back under the sink, slide the mounting ring on, and tighten the screws down. Clean up any putty that squeezes out around the edges.
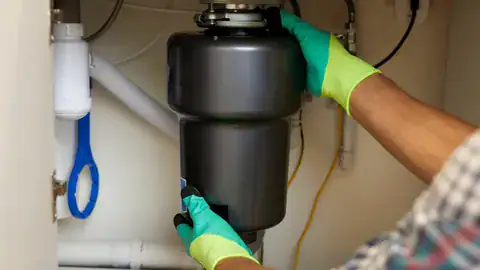
Step 3 — Get the Unit Up and Locked In
Lift the disposal to the mounting ring. Match the tabs on the unit to the slots on the ring and twist clockwise until it clicks into place. Should feel solid if it is wobbling around it is not seated right. Dishwasher inlet on the side? Get that hose connected and the clamp tightened before you move on.
Step 4 — Plumbing
The discharge tube on the side of the unit connects to the drain trap. Use the slip nut and washer from the box. Hand tight first, then a small turn with the wrench. Do not crank it too much, pressure cracks the fitting. P-trap came loose when you pulled the old unit? Reassemble it now and make sure everything is snug before moving on.
Step 5 — Wiring
Unit without a cord? Pull the cover plate off the bottom. Black to black, white to white, green or bare copper goes to the ground screw. Connectors twisted tight, taped, cover plate back on. Does the unit already have a cord? Plug it into the outlet and move on.
Step 6 — Test Before You Close Everything Up
Breaker back on. Cold water running. Hit the switch. Listen for anything that sounds off and then get under the sink and eyeball every connection while the water is still going. Nothing dripping anywhere means you are done.
Tips Worth Knowing Before You Start
- Crack open the manual that came in the box before you do anything different brands have quirks that no general guide covers
- Got a heavy unit? Grab someone to help hold it while you twist it into the ring doing that solo is genuinely awkward
- Gloves and safety glasses before you reach into the drain area edges in there are sharper than they look
- Do not reassemble the cabinet until you have run a full test with water going
- Keep the bucket and towels close disconnecting old drain pipes always releases some water
- Cold water only when the disposal is running it keeps grease moving through the pipe instead of coating the inside
Cost of Garbage Disposal and Installation in Lexington KY
The cost of garbage disposal and installation in Lexington KY really comes down to two things: the unit itself and who installs it.
The unit is where most of the money goes. A basic model handles everyday use without trouble. Pay a bit more and the unit runs quieter, grinds harder, and holds up longer before anything needs attention. Handle the garbage disposal installation yourself and the unit cost is all you are looking at. Bring a plumber in and labor goes on top of that.
A plumber takes care of the whole job, deals with permits if any are needed, and makes sure the setup is done right. For a straight swap in Lexington KY it is usually not a long visit.
When It Makes More Sense to Call a Plumber
A basic swap is something most people can handle. A few situations change that.
- No outlet under the sink and electrical work has to happen before anything else
- Drain pipes need moving or resizing to fit the new unit
- Old mounting assembly is damaged and will not take the new unit as-is
- Wiring under the sink looks questionable and you are not comfortable with it
- The unit has plumbing or venting requirements that go past a straight swap
Any of those come up and handing it off to someone who does it regularly is the right call.
What to Look At Before You Buy
Garbage disposal replacement starts before you walk into a store. A few quick checks save headaches later.
Drain opening measured? Most are 3.5 inches but verify yours. Space under the sink accounted for? Bigger units need more room and not every cabinet has it. Outlet under the sink present? If there is not one, a 120 volt outlet needs to go in before the disposal can. And think about how much use the disposal is going to see a light-duty unit will not survive a kitchen that runs it hard day after day.
Keeping the Unit Running After It Goes In
Good habits after the install are what keep a disposal going strong instead of needing early garbage disposal replacement.
- Cold water on before the unit starts, keep it running a few seconds after shutting off.
- Fibrous vegetables, bones, coffee grounds, big loads of starchy food none of that goes down there.
- A handful of ice cubes every couple weeks scrubs the inside walls clean.
- Baking soda followed by white vinegar once a month deals with grease and smell.
- Chemical drain cleaners stay out of the disposal entirely they destroy the rubber components inside.
Conclusion
Garbage disposal installation in Lexington KY is a job most homeowners can get done in a couple of hours when the right tools are on hand and the steps get followed in order. Go one step at a time, check every connection as you go, and run a proper test before closing the cabinet back up.
Electrical work or new plumbing in the picture? That is when a plumber in Lexington KY makes sense. Getting it in right the first time is what keeps the unit running and pushes off early garbage disposal replacement.

FAQs
A straight swap usually runs one to two hours for most garbage disposal installation jobs in Lexington KY. Electrical or plumbing work adds time on top of that.
The cost of garbage disposal and installation depends on the unit and whether the job is done by a plumber or handled yourself. The unit is the biggest piece of the number. A plumber in Lexington KY covers the full job but adds labor to the total.
Bottom leak, grinding sounds that do not clear after a jam gets fixed, or a unit that will not respond after the reset button gets pushed. A unit that keeps running into the same problems is usually past the point of another fix, garbage disposal replacement is the move.
Power off, old unit out, new flange in, new unit mounted, plumbing and wiring hooked up, then test it. The steps above cover the whole thing and it is straightforward when the existing setup is already there.
Most straight swaps do not need one. New electrical work or plumbing changes under the sink might. A plumber can tell you exactly what applies to your situation.